Image Viewer
 The Clooz Image Viewer has been designed to support transcription of data from digital images.
This includes features such as:
- Row and Column header overlays allowing panning of the main content while keeping the headers visible and aligned
- Row guide to keep your place in the image while transcribing
- Image adjustment features to improve the readability of the image (brightness, contrast, rotation)
- Magnifier box
- Zooming and panning
- Docked or Floating Window
For instructions on linking digital media files to Clooz records and displaying them in media viewers such as this one, see Working with Digital Media Files.
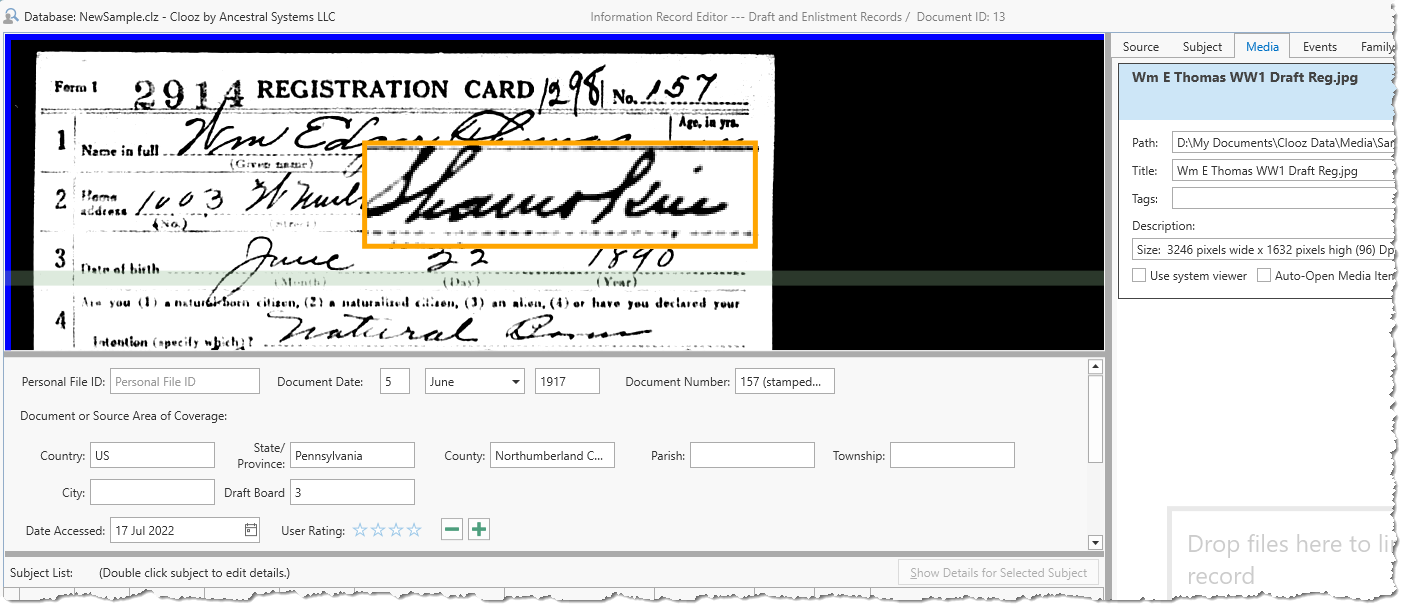
The Image Viewer Control Panel
 Most of the Image Viewer features are controlled by a control panel which appears whenever the cursor is over the viewer window.
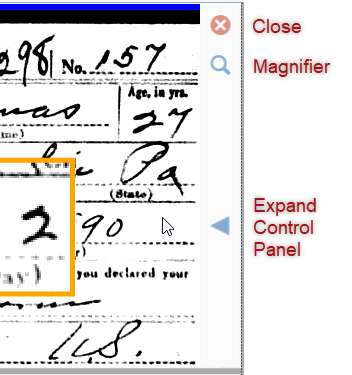
The Control Panel immediately provides access to several buttons:
- Close Button (closes the viewer)
- Magnifier Button (toggles magnifier box on/off)
- Expand Button (click the arrow to fully expand the Control Panel)
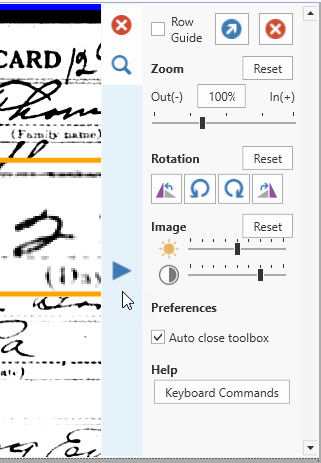 When fully expanded, the Control Panel shows the full set of controls.
To close the Control Panel, click the right arrow, or if the Auto close toolbox checkbox is checked, the Control Panel will retract automatically when the cursor is no longer over the Control Panel, and disappear completely when the cursor is no longer over the viewer.
Floating and Docking the Viewer to and from an External Window
I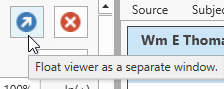 f you have more than one monitor you might want to display images in a separate window on the other monitor to allow more room the rest of the Clooz window. To do this, click on the float button in the Control Panel or Press Ctrl+F.
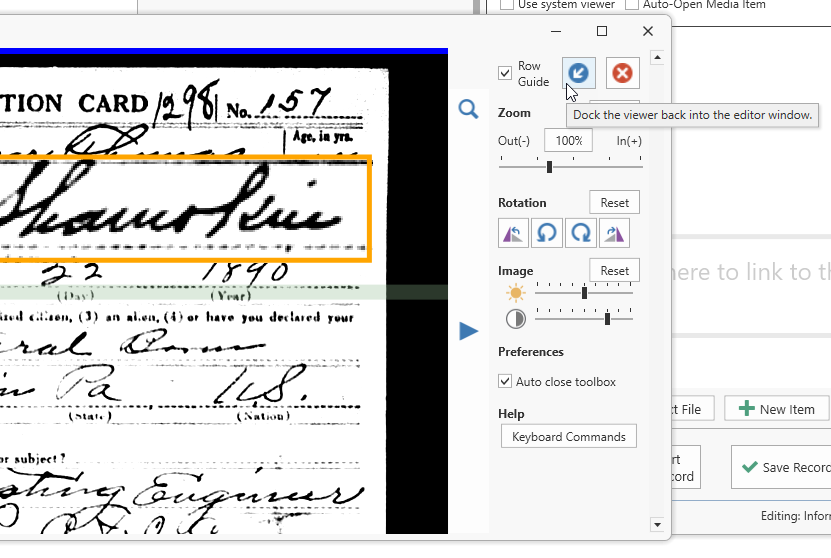 To return a floating viewer to inside the Clooz window, click on the dock button in the Control Panel (or press Ctrl+F).
These buttons appear in the same location within the Control Panel. Which one will appear depends upon whether the viewer is currently floating or docked.
Use the keyboard command: Ctrl+F to jump back and forth between floating and embedded viewer positioning. The viewer needs to have current program focus (was last thing clicked) for keyboard commands to work with it.
Panning The Image
To move up/down/left/right in a displayed image, do one of the following:
| Panning Action | Mouse | Keyboard |
|---|---|---|
| Pan Up/Down | Use Mouse Wheel | Ctrl+Up/Down Arrow |
| Pan Left/Right | Shift+Mouse Wheel | Ctrl+Left/Right Arrow |
| Pan any direction | Click and drag | |
| Recenter on a desired point | Double-click the point |
Zooming the entire image
There are several ways to zoom the entire image. First ensure the viewer has program focus by clicking in it once if you have been working in other areas of the Clooz window. Then do one of the following:
| Type of Zoom | Mouse | Keyboard |
|---|---|---|
| Zoom in/out at cursor location |
Ctrl+Mouse Wheel (continuous) or |
|
| Zoom in/out based on image center | Control Panel zoom slider | NumPad Plus / Minus |
| Zoom to a rectangle | Shift+Left Click - Drag to draw rectangle | |
| Best fill the viewer / Default level | Control Panel Reset button | Ctrl+NumPad 0 |
| Zoom 100% of original image size | Control Panel 100% button | Ctrl+NumPad 1 |
Clooz does have limits on how far you can zoom in or zoom out. When you hit the limit, the zooming ceases to show further changes.
Using the Magnifier
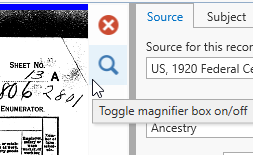 The Image Viewer supports a magnifier function for enlarging just a portion of the image. To display (or hide) the magnifier box, do one of the following:
- Move the cursor over the image to display the control buttons on the right, then click the magnifier button,
- Click anywhere inside the image viewer to ensure it is the active control, then press Ctrl+M.
 The magnifier box should now be appearing in the center of the image viewer. You can now control its size, location and magnification:
| Action | Mouse | Keyboard |
|---|---|---|
| Move box | Click and drag magnifier (cursor inside box) | |
| Increase/decrease size of magnifier box | Use mouse wheel while cursor if over magnifier |
Ctrl+Shift+NumPad Plus/Minus |
| Reshape magnifier box | Drag any of the sides or corners | |
| Increase/decrease magnification | Hold down Ctrl key while using mouse wheel while cursor if over magnifier | Ctrl+NumPad Plus/Minus |
| Close magnifier | Double-click magnifier | Ctrl+M |
The magnifier is dependent on the resolution of the underlying image to support significant enlargement. If the magnified area is not of sufficient quality, try enlarging the entire image since this regenerates the image from the original file contents.
Displaying the Row Guide
 The Row Guide is a faint horizontal bar which you can drag up and down over the image, serving as a placeholder as you transcribe the information.
Check the Row Guide box in the Control Panel to display the Row Guide, or press Ctrl+Alt+Spacebar when the image has focus (you might need to click inside the image to shift program focus to the Image Viewer).
 When you position the cursor over this bar it will show as up/down arrows, click and drag the bar to the desired position.
The guide bar can also be moved by keyboard actions: Ctrl+Alt+Up/Down Arrows.
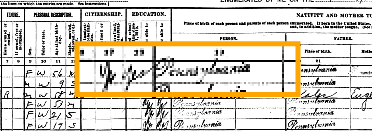
Using the Row and Column Header Overlays
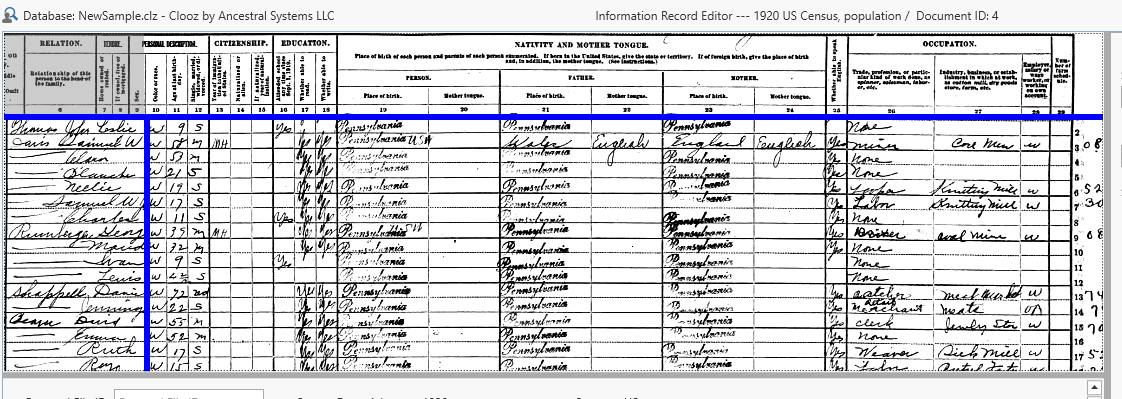
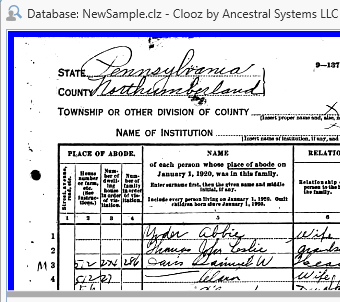 You probably have noticed the blue bars at the top and left side of the Image Viewer. The bars can be dragged to open up overlay displays that you can use to display the headers for columns and perhaps the name column as row headers. Of course this is only useful for images of tabular documents, such as census forms, which have rows and columns. Once these header overlays are setup they will remain in position as you pan around within the details of the document being displayed, much like the fixed rows and columns feature in most spreadsheet software. The column headers will move left and right only as you scroll through the image. The row headers will only move up and down to remain aligned with the rows showing in the image. Whatever part of the image you are looking at the column and row headers will still be visible.
Here are the steps involved:
-
Make sure the image is properly oriented. The rows must be horizontal (with no tilting). Use the rotation adjustment in the Image Viewer's Control Panel to level the image if needed.
-
 Now grab hold of the top blue bar (hover cursor over it and click) and drag it down to create enough space for your column headers.
 -
With the cursor positioned in the top area (above the bar you just moved), click and hold down the left cursor button. Drag the image upward to until the column headers on the image are in view.

-
 Now do a similar setup with the bar on the left side, dragging it in and then positioning the overlay image to show the rows of the Name column.
 -
The overlays are now setup. In the main image area, start panning and zooming to notice that the overlays will continue to show what row and column you are looking at.
When zooming the main area, the overlays will zoom as well, so you may need to adjust the size of the overlay areas by moving the bars and / or repositioning the overlay images.
Correcting Image Orientation (Rotation)
Images are sometimes incorrectly oriented sideways or upside down, or perhaps just at a slight annoying angle. Do one of the following to correct this as needed (either using Control Panel features or keyboard commands when the image has program focus (has been clicked at least once):
| Rotation Action | Control Panel | Keyboard |
|---|---|---|
| Rotate 90 deg Clockwise or Counter-Clockwise | 90 deg rotation buttons | Ctrl+Shift+R or L |
| Rotate 2 deg increment | Slight rotation buttons | Ctrl+R or L |
| Restore original rotation angle | Rotation Reset button | Ctrl+N |
When using the row and column header overlays it is important that you first have the image correctly oriented such that rows in the image are horizontal oriented.
Improving Image Viewing
If you are having a difficult time reading the data in an image, try adjusting the brightness and contrast using those controls in the Contrrol Panel. Click and drag the appropriate slider bar. Click the Reset button to return the values to the original setting (or press Ctrl+B).